Dyeing a Long Gradient Yarn at Home with Food Dye!
I've been finding that it isn't as easy to find super long gradient yarns as I thought it would be for Circo Mystery Cowl KAL and decided to teach you how to make your own! I used to dye yarn for many of my weaving projects in college and it was great fun to resurrect my dyeing skills.
 The instructions below use readily available materials and can be done in your kitchen as the dyes are food safe.
 What you will need:
400 yard skein of fingering weight wool yarn (if you plan on using beads on your yarn read this post first)
I used Jill Draper Makes Stuff Esopus in Ash.
Wilton Icing Dye (You can find this at your local craft store, or online)
I used Violet.
Vinegar
Glass or Plastic Bowl (don't use your favorite, it might get stained!)
Plastic spoon
Microwave
Gloves (don't forget these, you will regret it!)
Resources:
Dyeing with food grade dyes
Fresh Stitches series on dyeing
Instructables Tutorial on Dyeing with Food Coloring
Knitty Tutorial
Note: This style of gradient dyeing gives a pretty hard "line" between the two colors, if you want a more gradual shift from color to color you have to dye the end of a sock blank. I don't have a knitting machine, and life is TOO SHORT to knit a sock blank by hand and then dye it and rip it out. I have heard you can soak a tightly bound ball of yarn and just let the dye penetrate the outside of the ball, but I'm not sure how to set this. That is an experiment for another day!
Time for a Winner: Congrats to Susulu69 you are the winner of a KnitCircus kit for Circo Mystery KAL! Get in touch with you address so I can send it out to you! (ALSO.... SQUEE! Yeah Suzy! I did a happy dance when your name came up!)


400 yard skein of fingering weight wool yarn (if you plan on using beads on your yarn read this post first)
I used Jill Draper Makes Stuff Esopus in Ash.
Wilton Icing Dye (You can find this at your local craft store, or online)
I used Violet.
Vinegar
Glass or Plastic Bowl (don't use your favorite, it might get stained!)
Plastic spoon
Microwave
Gloves (don't forget these, you will regret it!)
- Wind Yarn
I took about 3/4 of my yarn and wound it into a ball and left the last 1/4 in a skein to dye. If you decide to dye yarn for Circo Cowl MKAL, you'll want to wind 275ish yards into a ball and dye the rest.

- Soak Your Skein
Soak the "skein" end of your yarn in a solution of 3 parts of water to 1 part of vinegar for at least 1 hour if not more. This helps wet and prep your skein so that it is ready to take on the dye. Take your yarn out of the bowl and squeeze it out. Dump out your vinegar water.

- Prepare Dye
With gloves on, dilute dye into 1/2 cup warm water (in the bowl from above)... ensure that all the dye is dissolved and no lumps are left. I used about 2 teaspoons of Wilton Icing Dye. Use more if you want a saturated/darker color, and less if you want it lighter. You can always re-dye your yarn if it isn't dark enough but it is hard to get the dye out once it is set.
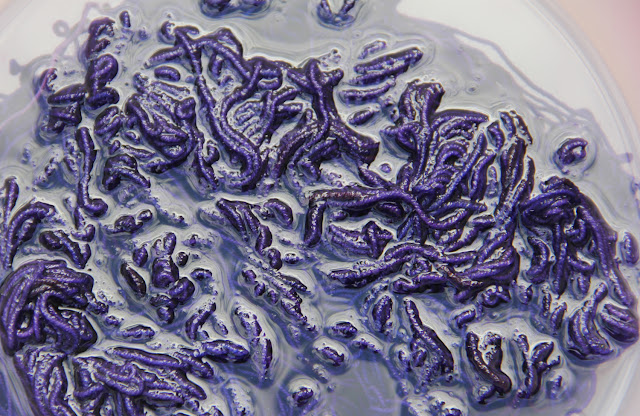
- Dye Yarn
Keeping gloves on, place wetted yarn into dye solution. Add more water so that your yarn is covered. With gloves or spoon stir around gently making sure the dye penetrates your yarn evenly.

- Cook Your Yarn
Place bowl of yarn and dye into microwave and cook on high for 3 - 5 minutes. Let stand for 3-5 minutes. Carefully lift yarn out of bowl and add big glug of vinegar (like one cup), stir it and add the yarn back in. Cook and let cool as you did before until your dye water is clear which means all the dye has bonded with your yarn. (At least 2 more times.) Do not worry if your dye bath doesn't exhaust. Just continue below.
Exhausted Dye Bath - Cool Down
Allow your yarn to sit in the dye bath and let it cool down.
- Rinse Your Yarn
Dump out your dyebath and gently rinse your yarn in luke warm water. Do not use hot or cold water, you don't want to shock your yarn fibers. Continue rinsing until the water runs clear. If it doesn't run clear go onto Step 8. If it does hang your yarn to dry (This is the hardest part... waiting for it to dry!)
- Set Your Yarn
If your water didn't run clear you can "re-cook" it with more vinegar and water. Make a solution of 50/50 water/vinegar and put yarn in it. Cook/cool as you did before until water is clear. Then let it cool and rinse out as in Step 7.
- Rewind Your Yarn
Take your yarn and wind it into a pretty gradient ball! If you are dyeing your yarn for Circo know that I knit the dark end of the skein left, so I wound that to the inside of the ball.


Resources:
Dyeing with food grade dyes
Fresh Stitches series on dyeing
Instructables Tutorial on Dyeing with Food Coloring
Knitty Tutorial
Note: This style of gradient dyeing gives a pretty hard "line" between the two colors, if you want a more gradual shift from color to color you have to dye the end of a sock blank. I don't have a knitting machine, and life is TOO SHORT to knit a sock blank by hand and then dye it and rip it out. I have heard you can soak a tightly bound ball of yarn and just let the dye penetrate the outside of the ball, but I'm not sure how to set this. That is an experiment for another day!
Time for a Winner: Congrats to Susulu69 you are the winner of a KnitCircus kit for Circo Mystery KAL! Get in touch with you address so I can send it out to you! (ALSO.... SQUEE! Yeah Suzy! I did a happy dance when your name came up!)
Congrats to you Suzie! Very happy for you.
ReplyDeleteI'm planning the ball method tomorrow, that will be fun!
ReplyDeleteThis is so cool!
ReplyDeleteCongratulations Susulu69!!
Ooohhhhhhhhh!!!! And you did my fav colors! I'll take that ball if ur not going to knit it ;)
ReplyDeleteThank you for the great explanation on dyeing the yarn and congrats Suzie! I'm so excited for you!
ReplyDeleteWoot! Love your blog post. Congratulations Suzie!
ReplyDeleteCongratulationsSuzie!!
ReplyDeleteYour instructions are is great, Laura! Thanks for Letting us know what you did. If, once the dyed yarn is dry, you decide that it's not dark enough, would you just follow the same process again to darken it?
ReplyDeleteThanks Jennifer! Follow them exactly as above, but you can skip the winding step as that is already done!
Deletewhat you could do, though, is just dye the last bit darker and then there would be an intermediate shade as part of the gradient.
DeleteCongratulations, Suzie. The colour gradient is luscious.
ReplyDeleteHappy for sweet Suzie to win the prize gradient yarn and beads ♡
ReplyDeleteCongrats Suzie!!! So happy for you!
ReplyDeleteCongrats Suzie ��
ReplyDeleteThanks for the tutorial Laura x
One question tho … what do you do with the other end of the yarn while the part you're dyeing is in the microwave ?
Thanx Sally (piri127)
I have that inside the microwave next to the bowl, so it spins around with it, but isn't sitting in the dye!
DeleteSooooo excited and shocked really!!!! Thank you Laura for such an amazing treat and thank you my dear friends for your kindness and wished. So looking forward to this MKAL and getting back with my friends!
ReplyDeleteI'm confused...there is one skein of grey and one purple, that you dye? How is that gradient?
ReplyDeleteHi Kim, What I did is overdye one end of a grey skein of yarn with purple dye to create a shift from grey to purple.... you can see in the notes above that this style gives a pretty hard "line" between the two colors, if you want a more gradual shift from color to color you have to dye the end of a sock blank or use another gradient dyeing style.
Deletethanks for the tutorial! I'll look for that food coloring. I have dyed a cake of yarn to get a gradient - I used an old crockpot instead of the microwave - just let it sit until the water is clear, then shut it off for the cool down. Rinse by squishing the cake in clear water. that part takes longer than if it is unwound, but it makes a nice gradiant cake of yarn. Alternatively, you can check our www.purplefleece.com for some brilliant gradiant yarns. :-)
ReplyDeleteThis comment has been removed by the author.
ReplyDeleteWind yarn into several small skeins and use increasingly weaker dye solution for each one - that will give you a smooth long gradient.
ReplyDelete