Novus Collection: Working Gauge
Next up in my blog series dedicated to the Novus Collection is a treatise on gauge! I have a detailed blog post about working gauge in my patterns, but Las Cruces and Hot Flash are unique and I wanted to make sure I have covered a few extra things!
 First up, I want to reiterate this note on gauge taken from the pattern:
Gauge- Correct row gauge is essential for this design, as it determines the width of the body. Because of this, you will need to count rows as you knit, instead of knitting to measurements. The pieces will look too small as you knit them, but will block out to the correct measurements. It is very important that you work a large gauge swatch in the pattern stitch and block it before knitting the sweater.
Next, I want to explain WHY this is:
The sweaters in Novus are knit side to side. You start at the sleeve cuff and work inwards. This means that row gauge determines with width of your sweater and stitch gauge your length. (You can read more about the construction here).
Working Gauge for the Sweaters in the Novus Collection, step by step:
So, have any questions? Ask away! I am happy to help!

Gauge- Correct row gauge is essential for this design, as it determines the width of the body. Because of this, you will need to count rows as you knit, instead of knitting to measurements. The pieces will look too small as you knit them, but will block out to the correct measurements. It is very important that you work a large gauge swatch in the pattern stitch and block it before knitting the sweater.
Next, I want to explain WHY this is:
The sweaters in Novus are knit side to side. You start at the sleeve cuff and work inwards. This means that row gauge determines with width of your sweater and stitch gauge your length. (You can read more about the construction here).
Working Gauge for the Sweaters in the Novus Collection, step by step:
- Cast on for a sleeve in the size you are making. Use the needle size called for. If you know you knit loosely, then go down a needle size. If you knit tightly, go up!
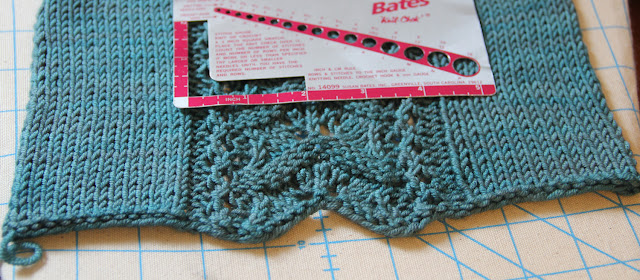
- Begin to knit the sleeve as outlined in the pattern. Work at least 3 repeats of the stitch pattern. Place all your sts on scrap yarn!
- Soak your swatch in warm water for 5 minutes, if not longer. You can use a little wool wash if you want, but it’s not necessary.
- Take your swatch out of it’s bath and squeeze out all the water in a towel.
- Lay out your swatch flat. I use my ironing board for this as things dry quickly on it and the surface can get wet. Smooth out the swatch, but DO NOT pin it, you want to be blocking this swatch EXACTLY as you will block your sweater. If you are working with a yarn that doesn't have alot of memory (like alpaca, silk, linen, or cotton) then you might want to "hang" your swatch off of the edge of your ironing board and put a bit of weight on the ends. (I used my wonder clips for this.) What this does is simulate the weight of your finished sweater giving you a bit more of an accurate gauge. Hanging the swatch will cause your stitch gauge to pull in and your row gauge to stretch out. Stitch and row gauge are linked, you can't shift one without changing the other!

- Let dry completely. (Important!)
- Measure your stitch and row gauge. You want to do this over multiple inches, making sure you keep away from the edges to get an accurate stitch count. Re-read the above note! How is your row gauge?
- What is awesome about this? If you are "on" with your stitch gauge you can put your stitches back onto the needles and keep knitting your sweater. If you aren't then you'll need to cast on another sleeve on a different size needle, but you'll already be familiar with the pattern, so it will go faster, right?
- PLEASE DON'T SKIP DOING A GAUGE SWATCH.... your sweater might not fit the way you want it to, and that would BE SAD! : (!

So, have any questions? Ask away! I am happy to help!
I think I will be a learner all my life! I love knitting but I will never be good at it. So keep teaching me PLEASE!
ReplyDeleteEllie Lilienfield
I have heard of but never seen anyone demonstrate knitting using the lefeline hole found in many circular needle sets. I might use a life line more often if I did have to put my work down & thread a life line across. Keep knitting, blogging, & video-ing & I will come. Thank you. Kathy
ReplyDeleteKathywaters3679@comcast.net